Performative Exhibition

This was the fist project for this semester I worked as group, my group partners are Salama Almohanadi and Maryam Almanai. I started this project searching for a show that I was interesting in. I spend my weekend binge watching.

Week “1”:

My group and I decided to exhibit ” Sherlock Holmes “. We have chosen the first series the second episode. We had chosen ” Sherlock Holmes” because we like the way of his thinking and we wanted to have everyone els to try and have the opportunity to live and experience the Mistry and investigation life.

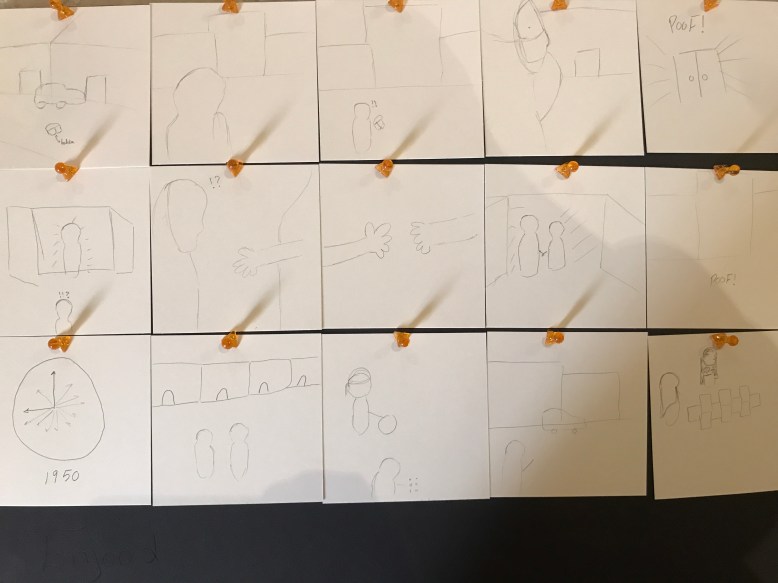
We stared analyzing the episode and the characters. Then we build 3 constructs and concepts that we would like to explore as a group.

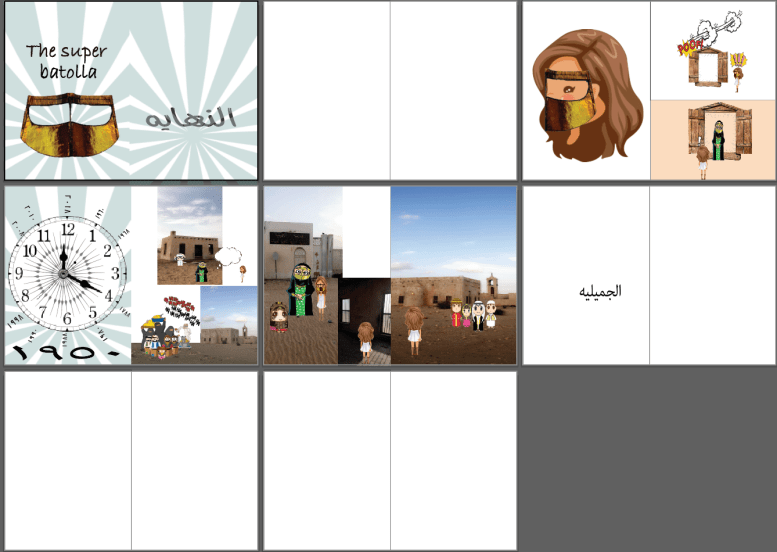
We spied the work but before starting we had each girl make an sketch of ideas and gather all the strong ideas together to have one main and strong idea that we would present.

IMG_6006.JPG

Week “2”:

By the following week we had gathered the ideas in one sketch and had one idea, but what had concerns me and the group is the wooden house that we had to build. We sit as a group at the break time and tried to solve the problem.It came up then into my mind that we could build the house on our on and at the same time having fun building it.

IMG_6008.JPG

IMG_6009.JPG

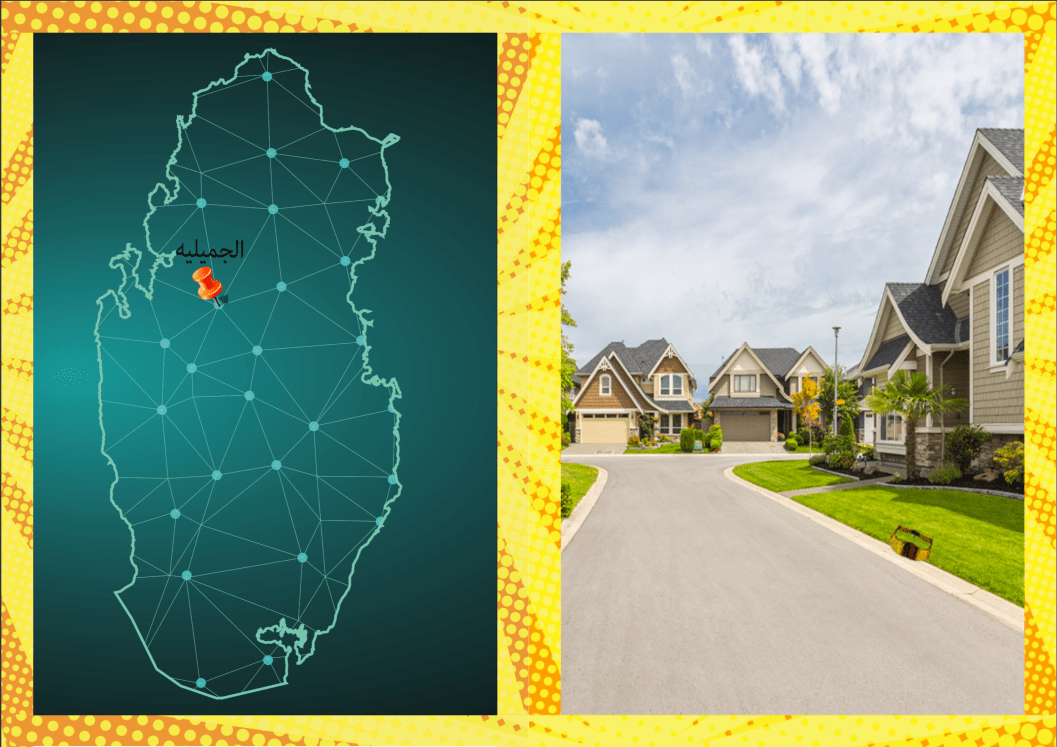
At the following day we choose a place to exhibit in and took some photographs of the place and the measurements.

IMG_5970.JPG

On the next day I went to the wood shop and bought 6 large plywood.

We had adjust some ideas on the last sketch on that week to start building the wooden house and looking for things that we need.

IMG_6010.JPG

IMG_6011.JPG

On the weekend I researched for the charechters and some information about them and took some photographs of the main characters in this episode. Then I stared working and building the wooden house. I had faced some problems on that day, 1- The plywood wasn’t big enough for the door I had to make the door smaller to not brake the plywood. 2- I had to thing of a way for transporting the house. 3- the group had to look for a uv light and an invisible ink pen which we couldn’t find in any shop in Doha.

IMG_5998.JPG

IMG_5999.JPG

Week “3”:

In the third week Maryam did a schedule for each one in the group and gave her a task to do in the third week, to be in truck and to have the work done before the exhibition date.

IMG_6029.JPG

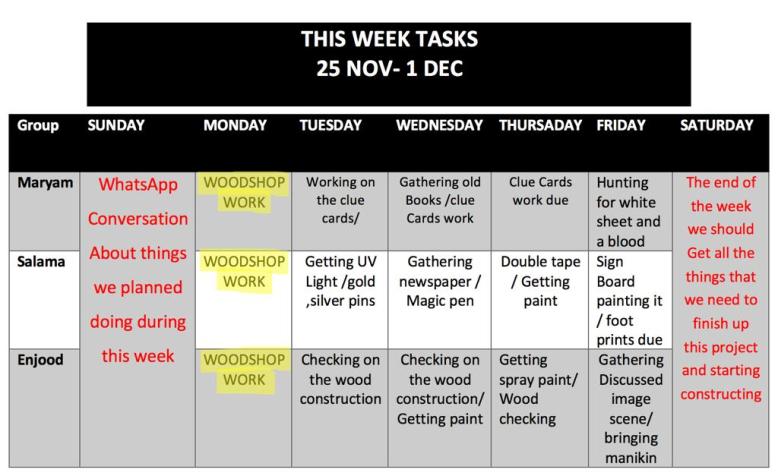
On Monday we went to the woodshop to do the sign.

IMG_6027.JPG


After finishing from the woodshop we did a list of each one job and what she will bring to not forget any thing on the exhibit date.

IMG_6026.JPG

We had a problem on that day we couldn’t find the uv light in Qatar, salama looked in different shops but she didn’t find what we are looking for. Salama suggest to visit the material shop in VCU, when we went there we found what we was looking for and helped us a lot, we got excited and can’t wait to start working on it. We borrowed “2” UV lights, 1 glowing color pen and glowing gel.

IMG_6048.JPG

On next class we  vinel cut the foot print, we did them 2 colors black ” as the victim walked towards the dead body” and the red ” as it is leaving after the murder happens.

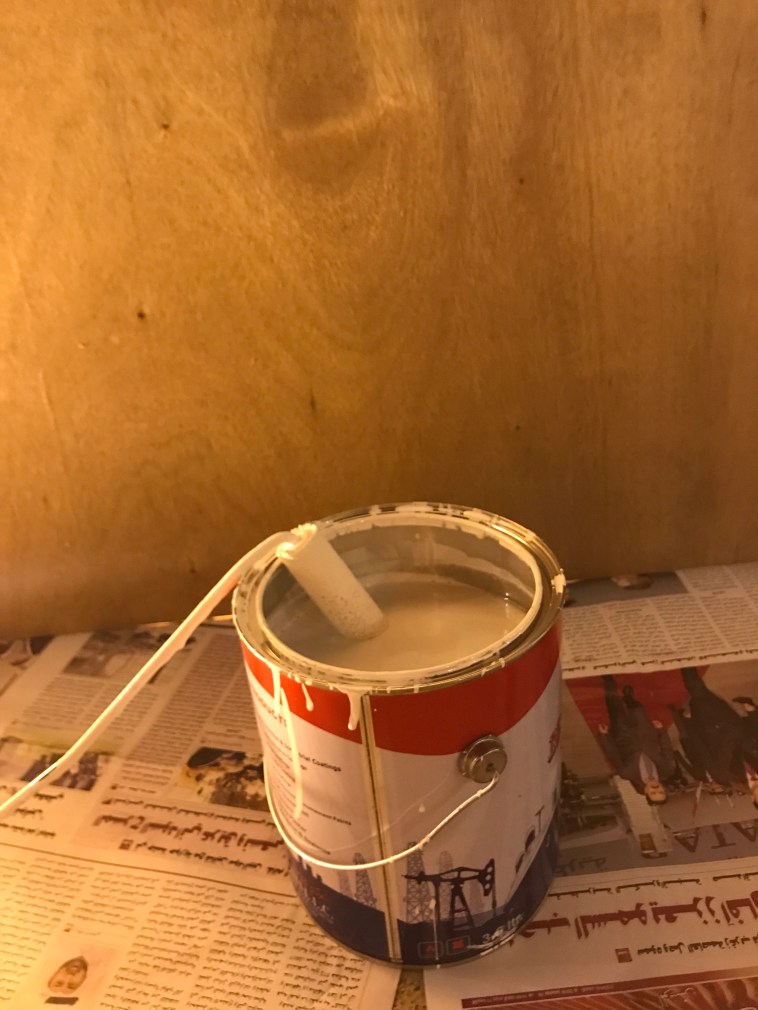
On the weekend I started painting the plywood to have it finish by the week after it to build it on the following Saturday.

IMG_6111.JPG

Week “4” :

On this week we had every thing ready to set up but we had some issues in the handyman, we had to figure and solve this problem with the university safety facility. On the next class we had this problem solved it end up they are gonna bring us a handyman to help up building the wood house.

On this weekend it was a busy 2 days we give every person in the group a task to do and to bring to be ready for setting up on Saturday.

IMG_6141.JPG

On Saturday we had everything the handyman came around 1 o’clock and they started building the wood house. While they was building it we had an issue the house was very small I had to get more plywood, but when the plywood arrived the handyman told me that he have to go back. We started painting to prefend delays.

On Sunday the handyman came around 2 o’clock and added the last piece. We countinued painting.

I started adding the foot print on the floor, while Maryam painting the front door and Salama hanging the newspapers.

IMG_6152.JPGIMG_6256.JPG

We tried the UV light on that day on the wall to know if it works or not.

IMG_6178.JPG

Maryam wrote the quotes on a paper she made which gave the seen some drama.

IMG_6146.JPG

On the exhibit date we had some issues the newspaper fall off and we had to harry up and make them on time we finished up every thing on the time and the out come of the deconstruction was perfect and every thing goes as we planned.IMG_6252.JPGIMG_6251.JPG

I was so glade to work with Salama and Maryam they worked hard and put a lot of effort to finish this project. If I would do a group project again I would defiantly work with them again.

I fell proud of my self and my group about the out come we had a lot of pressure but we focused to make it happen.

The Sequential Comic Narrative

I started this project by searching for the meaning of 10 words as a biggining of the project. Then I looked for some comic books examples to get some ideas before starting.

  1. Irony: the expression of one’s meaning by using language that normally signifies the opposite, typically for humorous or emphatic effect.
  2. Metaphor:a figure of speech in which a word or phrase is applied to an object or action to which it is not literally applicable.
  3. Personification: the attribution of a personal nature or human characteristics to something non-human, or the representation of an abstract quality in human form.
  4. Cliche:  a phrase or opinion that is overused and betrays a lack of original thought.
  5. Vernacular: he language or dialect spoken by the ordinary people of a country or region.
  6. Pun: a joke exploiting the different possible meanings of a word or the fact that there are words which sound alike but have different meanings.
  7. Oxymoron: a figure of speech in which apparently contradictory terms appear in conjunction.
  8. Simile: a figure of speech involving the comparison of one thing with another thing of a different kind.
  9. Metonym: a word, name, or expression used as a substitute for something else with which it is closely associated.
  10. Satire: the use of humour, irony, exaggeration, or ridicule to expose and criticize people’s stupidity or vices, particularly in the context of contemporary politics and other topical issues.

On the next class I started sketching my ideas for the comic book, which will be talking about a batola which takes you to the past when wearing it.

IMG_5617.JPG

On Wednesday at class we set as groups and tell our story and show the story board. I had some critique from the girls and had to adjust the story board to have it more clear.

IMG_5628.JPG

The story board helped me a lot to improve my store and to figure out the spots that I am missing in the story so I worked on it and tried my best to improve it to make it more sense.

Before starting build the comic book up a thought came up to my mind “how to tell a story”. story telling can be told by color, illustration style/ photography, frames-variety and editing sequence.

After that I started working on the comic book and this when an idea came up to make a comic book that contains pictures and digital design combined with drawing and different materials. I started collecting and creating digital drawing and start building my comic book.

Having a week off on the rainy week helped me to work harder on the book but at the same time I got lost but I figured my way back on truck.

I was working on illustrator to make the comic book which I had an issue with stretching and placing the picture in the right position.

Screen Shot 2018-11-12 at 10.42.28 AM.png


The fist design was a mess I thought that Law and Leland gonna kill me because of the stretching and pixelated. Then I started again with different illustration and took pictures.

Screen Shot 2018-11-12 at 10.42.07 AM.png

I had some pictures which was missing and I had to go and take more pictures.

At the begging I was using illustrator but then on the next class when Law and Leland mentions indesign and I tried using it it was much easier to do the book.

I continued using indesign and build my book from the beginning.

After finishing from building the story I started making the cover. I did 4 prototypes for the front cover and applied the one that I found more interesting.

Screen Shot 2018-11-13 at 3.06.36 PM.png

Screen Shot 2018-11-13 at 3.03.14 PM.pngScreen Shot 2018-11-13 at 3.05.03 PM.pngScreen Shot 2018-11-13 at 3.02.55 PM.png

I choose the last prototype for my cover, I want to combine pop art with khaliji style. I started then to apply the yellow boarder for the rest of the pages.

Screen Shot 2018-11-13 at 3.02.00 PM.png

Screen Shot 2018-11-13 at 3.02.00 PM.png

This was the first cover that I did when I printed the cover I found out that the batolla in pixelated, so I draw a batolla in illustrator and used the one that I had draw.Screen Shot 2018-11-13 at 3.27.46 PM.png

Then I decided to do the back cover the same as the front.

Screen Shot 2018-11-13 at 3.28.19 PM.png

After that I had to print my comic book and have it ready for next class, I had come issues printing it at the beginning I had my page in A3 and print it in A5 with was wrong but then I asked one of the juniors and then she helped me out I adjust the size made it A4 and print each 2 in one side. Then after that I faced another issue, I want to print them front and back but it keeps printing them in one size and lethally I printed more than 15 times until I get it right I figured that while printing I have to have it two-sides and short-edge binding to print it right.

After finishing printing I started coloring in the comic book and used natural sand to have it more realistic.IMG_5881.JPG

Then I sew the papers together, I saw it with haulm thread as it is part of the culture.

This was my final comic book after the final editing which I am proud of and had a lot of fun making it.

Screen Shot 2018-11-14 at 3.34.44 PM.pngScreen Shot 2018-11-14 at 3.34.58 PM.png

Screen Shot 2018-11-14 at 3.35.07 PM.png

Screen Shot 2018-11-14 at 3.35.18 PM.png

Screen Shot 2018-11-14 at 3.35.30 PM.png

Screen Shot 2018-11-14 at 3.35.42 PM.png

Screen Shot 2018-11-14 at 3.35.52 PM.png

Screen Shot 2018-11-14 at 3.36.05 PM.png

Screen Shot 2018-11-14 at 3.36.15 PM.png

100 Things ” Poster “

I started this phase researching for posters, collecting ideas and some informations before starting the project.

After research I had a punch of ideas running through my mind , I started writing notes and sketches . After that I began making the posters on photoshop,  I had made 5 posters as first prototype.

prototype 2.jpgprototype 3.jpg


prototype 4.jpgprototype 5.jpg

Untitled-1.jpg


On the next class having some feed back on the posters made me un happy with them so I had to choose 2 posters out of 5 and  re-do them as second prototype. I worked hared to make them as perfect as I can.


final 1.jpgUntitled-1.jpg


After third class I choose one of the posters and re create it, finish it up and make it ready to print. I made 6 models from the one poster that I had chosen to had more options while chooseing one of theme.

final 1.jpgfinal 2.jpg

final 3.jpgfinal 4.jpg

final 5.jpgfinal 6.jpg

After I finished from them I had my mother and sister in law creitique my work, based on their creitique I choose the last one on the left, I tried to improved it more. Then I had an idea to print the poster on a canvas fabric which symbolize apron which was one of my 100 things.

I had my poster ready for class which I was exited to show Law and Leland.

IMG_5439.JPG

After having creitique on Monday I have wrote down where my post is weak and what is the strongest thing in my poster, I improved the visual weakness in the poster and made it more stronger, but I thought that still my poster looks the same so I decided to take a risk and change a lot in my poster and worked more on the details. I am not a risk taker but although I took that big step, taking risks made my poster look diffrent which I am proud of. Then I asked my family and friends to creitique the new poster. I learnd from this project to not stick with one ideas and taking more risk and that risk is the key for success.

 final 1.jpg

100 Things

I started this project by choosing an object ” whisk” which I sticked with for 6 weeks.

After choosing my tool I start to create a mind map based on the tool, when the suffering begins. From the mind map I started creating 2D and 3D objects and illustrations and glue them in 10*10 pistol board.

Phase 001:

On the first week I created 40 designs, I had hard time making it, because I only had 4 days to finish all 40, I failed making some but I challenged my self and until I nailed it.

IMG_5256.JPG

IMG_5254.JPG

On the  end of the 2nd week of this project was the opposite words part, I had a paper with a lot of words and I had to create a 2 opposite objects. I created 30 opposite pairs out from the paper.

FullSizeRender 2.jpg

IMG_5255.JPG

By the 3rd week I had 100 different object hanged on the wall and 30  pairs.IMG_5381.JPG


Phase 002:

Pair of words and their antonym

In this phase I picked object from my 100 things and thing of a different ways to present it. Law and Leland  gave me a couple of words to think of another way presenting the object using the words, and that what I came out with.

IMG_5277.JPG

At the beginning I didn’t know what does the words mean so I start to search and until I get what is the meaning. Then I start to collect pictures and to know if its right while matching I choose the one that make sense more.

phase 002.jpg

Phase 003:

Word=Image=Image=Word

In this phase I choose 2 pairs that are similar by shape but different objects and combine them with 2 opposites words. In this phase I start to get it because it is slightly the same as phase 002.

phase 003.jpg